Button Confidence: The Field Test That Turns Your Drone's Return-to-Home Into a Plan
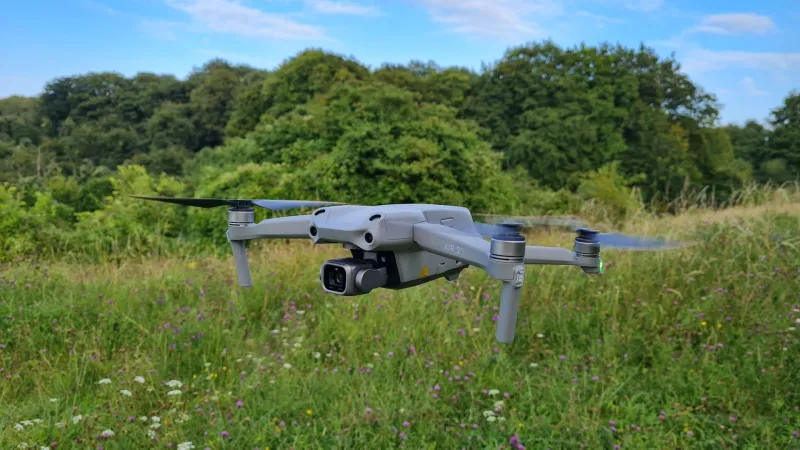
Return-to-Home is the feature every drone advertises and almost nobody rehearses. We press it once in the garden, watch the drone drift back roughly towards us, and file it under "sorted". Then a gust catches the aircraft at 300m, the screen dims, and we discover that RTH is less a magic button and more a set of assumptions about height, wind, battery and home point. The good news is that you can test those assumptions deliberately, in a field, on a quiet morning, with plenty of margin.
This is a field test, not a stunt. The aim is to understand how your particular drone behaves when RTH is triggered, then adjust the settings so the behaviour matches your flying. Do it in open space, keep the drone in visual line of sight, and follow the CAA Drone Code. If you are in a built-up area, near an airport, or inside restricted airspace, pick another day and another field.
Before you press anything
Start with the manual. RTH behaviour varies enormously between models: some climb to a set height first, some return at the current altitude if it is already higher, some use obstacle avoidance on the way home, and some simply stop when the signal is lost. Know which camp your drone is in before you test it.
Check the app's safety menu and note the current settings: RTH altitude, maximum altitude, maximum distance, failsafe behaviour, and whether dynamic home point is enabled. Update the home point manually before take-off and wait for a solid satellite lock. A home point recorded before the drone has a proper fix is the most common cause of a wonky return.
Pick a field with clear space in every direction and no tempting line of trees between you and the drone. A local sports field or open common works well, provided you are not disturbing anyone and local bylaws allow it. Bring a friend to keep an eye on the sky while you watch the screen.
Test one: the height check
Set your RTH altitude deliberately. In the UK, 120m is the legal ceiling, but your RTH height should be well below that and comfortably above the tallest thing in your flying area. For most open fields, 30m to 50m is a sensible starting point. If there are trees or hedges nearby, give yourself more room.
Fly out to about 30m, hover at 10m, and press RTH. Watch what happens. Does the drone climb to your set height first? Does it turn and track back smoothly? Does it descend at the home point or hover waiting for confirmation? Note the height it actually reaches and whether it overshoots. If it climbs to 50m when you set 30m, or returns lower than expected, adjust the setting and repeat.
The point is not to make RTH dramatic. The point is to know exactly what your drone will do when you are 200m away and the screen is hard to read.
Test two: distance and wind
Repeat the drill at 50m, then 100m if the field is big enough and your VLOS allows it. You are looking for consistency, not bravado. Does the drone return at the same height each time? Does it slow down into a headwind? Does the battery percentage drop faster on the way home than on the way out?
Wind is the big one. A drone returning into a 15mph headwind can take noticeably longer than the outbound leg, and that extra time eats battery. If your drone returns at a snail's pace when flying into wind, plan your flights so the return leg is downwind, or reduce your maximum distance. RTH is not a guarantee of reserve power; it is a calculation based on the battery you have left.
Test three: the obstacle question
Obstacle avoidance is brilliant until you assume it will save you. Test it gently, with a clear, soft obstacle and plenty of space, or skip this step if your manual warns against it. Fly slowly towards a tall hedge at a safe height and watch whether the drone stops, climbs, or carries on. Then trigger RTH from the far side of the obstacle and see whether it routes around it or simply climbs above your set height.
On many consumer drones, RTH will climb to the set height and fly straight home, which is why the set height matters more than the sensors. If your drone has forward and downward sensing only, do not expect it to dodge a tree behind it. The field test should tell you what the sensors actually do, not what the marketing implied.
Test four: battery failsafe
Low-battery RTH is the setting nobody wants to test because it sounds like an emergency. You can rehearse it safely. Note the app's low-battery warning threshold, then fly close to home until the warning appears. Observe whether the drone initiates RTH, hovers, or simply warns you. Land manually if you prefer, but note the behaviour.
Critical battery failsafe is different: many drones will land automatically, wherever they are. That is not a return, it is a forced landing. Know the difference, and never plan to rely on the critical threshold to bring the aircraft home. If your drone triggers RTH at 30% but the return leg takes 40% of the battery in wind, your margin is fiction.
Reading the results
After four short flights, you should have a page of notes: the RTH height it actually reached, the time it took to return from 50m and 100m, how it handled wind, whether obstacle avoidance interfered, and what the low-battery behaviour looked like. That is your drone's real RTH plan.
If the drone returned lower than expected, raise the RTH altitude. If it struggled into wind, reduce your maximum distance or fly a different route. If obstacle avoidance stopped the return, adjust your RTH height so the drone clears the obstacle entirely. If the home point drifted, enable dynamic home point only if you understand when it updates, and always confirm the home point before take-off.
Finally, repeat the drill after firmware updates and at the start of each season. RTH settings can change, batteries age, and wind behaves differently in October than in June. Ten minutes in a field is a cheap way to turn a panic button into a plan you actually trust.