Overcast Advantage: Picking ND Filters for the Light You Actually Fly In
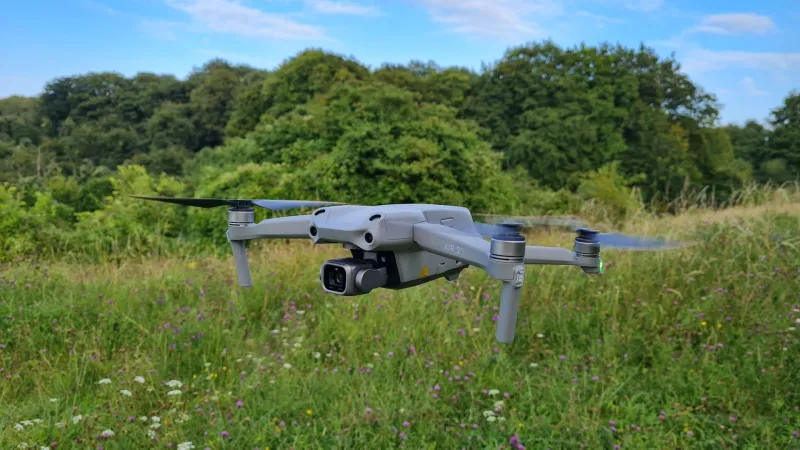
Walk into any drone shop and the ND filter section looks like a sweet shop: six little squares of smoked glass in a foam case, each one a different density. It feels like value. It feels prepared. And for most UK pilots, at least three of those filters will never leave the case.
That is not because the extras are bad. It is because they are built for a version of the British Isles that only shows up for a fortnight in July. The rest of the year, our light is softer, flatter and more changeable. If you want smooth footage and sensible shutter speeds, you need two filter strengths that match your camera and your local weather, not a six-pack of novelty glass.
The bundle illusion
A typical ND kit runs from ND4 to ND32, sometimes further. That spread makes sense in California or the Mediterranean, where midday sun is a wall of light and you genuinely need four or five stops to keep your shutter in check. In the UK, a bright overcast day might need three stops. A sunny spell might need four. A grey afternoon might need none at all.
So the six-pack is not wrong, exactly. It is just over-specified for the flight conditions most of us get. The result is a bag full of filters you never fit, plus a nagging feeling that you should be using them because you paid for them.
What two filters actually do
For most consumer drones with a fixed f/2.8 aperture and a base ISO of 100, the useful pair is a 3-stop and a 4-stop filter. In old money, that is an ND8 and an ND16.
Why those two? Because they cover the two light levels UK pilots meet most often:
- Bright overcast — think a high, thin cloud sheet with the sun trying its best. You might be reading 1/400s without a filter at 25fps. A 3-stop ND8 brings you down to roughly 1/50s, which is the sweet spot for the 180-degree shutter rule.
- Proper sunshine — the sort of day that makes you reach for sunglasses and a windbreak. Unfiltered shutter might read 1/800s. A 4-stop ND16 gets you back to about 1/50s.
That is it. Two filters, two jobs, and no foam slots filled with glass that only works on a Crete holiday.
A garden-table test for your own camera
Do not trust a generic online chart. Your drone, your frame rate and your preferred look all shift the numbers. Spend ten minutes at the kitchen table or in the back garden and test it properly.
- Put the drone on a stable surface and point it at a representative scene — a mix of sky and ground, not a white wall.
- Switch to manual camera mode. Set ISO to 100, aperture to its fixed value, frame rate to 25fps, and shutter to 1/50s.
- Without a filter, adjust the shutter until the exposure looks correct. Note the reading. If it sits at 1/400s, you need three stops. If it sits at 1/800s, you need four.
- Fit the candidate filter and check that the shutter returns to 1/50s at the same ISO. If the image is too dark and the drone wants to raise ISO, the filter is too strong for that light.
- Repeat on a dull day. If the unfiltered reading is already close to 1/50s, no filter is the correct answer.
That last point matters. A filter is a tool for controlling motion blur, not a magic sharpness button. If the light does not call for it, leaving it in the case is the professional move.
When a filter hurts more than it helps
Cheap ND glass is not neutral. It can add a colour cast, soften the corners and introduce flare when the sun clips the edge of the frame. On a small drone camera, that is often a worse trade than a slightly faster shutter.
There is also the gimbal to consider. Filters add weight right at the front of a delicate stabilised assembly. A well-made magnetic filter is usually fine, but a chunky variable ND can upset the gimbal's balance or push it into a calibration sulk. If your footage starts twitching after you fit a filter, take the filter off and see if the problem disappears before you blame the drone.
And be honest about stills. If you mostly shoot photographs, the 180-degree rule matters far less. A fast shutter is often exactly what you want for a crisp landscape. Filters earn their keep in video, where smooth motion is the goal.
Buying notes for UK shoppers
Buy the two strengths, not the box set. A decent 3-stop and 4-stop pair from a known brand will cost less than a six-pack of unknown glass and will get used every flight. Check that the filter is designed for your exact drone model — gimbal clearance is tight on folding models — and buy from a UK retailer with a returns policy you trust. If the filter arrives with a colour cast you cannot correct in editing, send it back.
Skip variable NDs for drone use unless you have a specific reason. They are heavier, can cause cross-polarisation artefacts, and the convenience is rarely worth the gimbal fuss.
Finally, label them. A small dot of paint or a strip of tape on the rim saves you squinting at tiny etched numbers in a windy car park. The filter you can identify in five seconds is the one you will actually use.
The two-filter flight bag
UK drone light is rarely dramatic and almost never consistent. That is exactly why a small, well-chosen filter kit works better than a big one. Two strengths, tested against your own camera, cover the vast majority of days you will actually fly. The rest of the foam case can stay at home — or better still, stay in the shop.